How to Clean Your Laptop Webcam for Better Video Quality
Published: September 25, 2025
Did you know that a tiny layer of dust or smudges on your laptop’s webcam can reduce video quality by 30%? A dirty lens can cause your image to appear unclear or dull during video calls. Whether you’re using a built-in camera or one of the many types of webcam available today, keeping the lens clean is very important. In this article, we’ll show you how to properly clean your laptop webcam so you may always appear clear and professional.
Tools Needed
Before you begin cleaning your laptop webcam, gather the following tools to ensure a safe and effective cleaning process:
- Microfiber cloth: Ideal for wiping down surfaces without leaving lint or scratches.
- Compressed air spray (air duster): Helps to blow out dust and debris from hard-to-reach areas.
- Soft or makeup brush: Useful for gently brushing dust from the speaker grills.
- Sticky tack: A non-damaging way to remove fine dust particles from speaker grills.
- Isopropyl alcohol (70% or lower): Perfect for cleaning without damaging the surface of your laptop.
- Cotton swabs: For detailed cleaning around the edges of the speaker grills.
Why Cleaning Your Laptop Webcam Matters
The webcam, just like your laptop speakers, plays a big role in your system’s overall performance. Whether you’re joining a virtual meeting, making a video call, or recording content, a dirty webcam lens can blur or distort the image. This often results in grainy or low-quality visuals. Since webcams are so important for communication and productivity, it also helps to know the pros and cons of webcam along with how to keep the lens clean. Here’s why keeping your laptop’s webcam clean is so important:
1. Clearer Video Quality
Dust, smudges, and fingerprints on the lens may decrease the quality of your video feed. A clean lens produces clear, high-quality images, particularly during professional calls or live streaming.
2. Better User Experience
A clean webcam prevents distracting marks or blurs, offering a more professional appearance during video chats or presentations.
3. Prevent Long-Term Damage
Dust and grime can gradually build up around the camera lens, resulting in scratches or internal damage over time. Regular cleaning protects the lens and guarantees that it continues to perform correctly without compromising video quality.
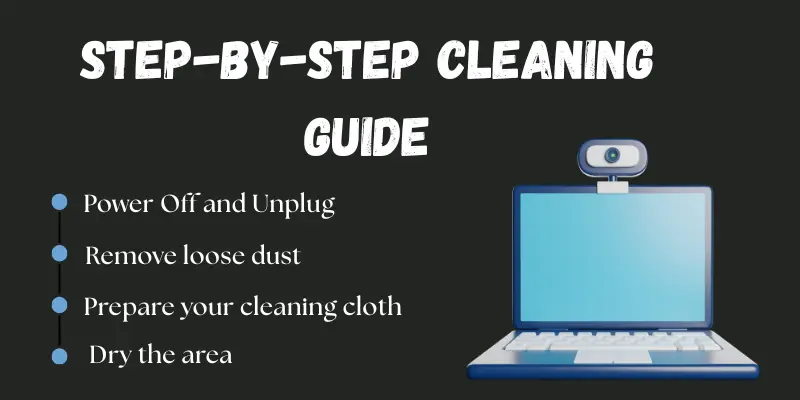
Step-by-Step Cleaning Guide
Follow these simple steps to clean your laptop webcam safely and effectively:
1. Power Off and Unplug
Turn off your laptop and disconnect it from any power source. This prevents damage and keeps you safe during the cleaning process.
2. Remove loose dust
To clean dust from around the webcam, use a soft-bristled brush or an air blower. This helps to avoid scratching the lens when you wipe it later. Make sure you do it lightly to avoid pushing dust deeper.
3. Prepare your cleaning cloth
Take a clean microfiber cloth and softly wet it with water or isopropyl alcohol (70% or lower). Do not wet the cloth just enough to clean without dripping. This sort of cloth is mild and will not scratch the lens.
4. Gently wipe the webcam lens
Wipe the webcam lens gently in small, circular motions. To remove smudges or fingerprints, start in the center and work your way out. To safeguard the lens, avoid pressing down too hard.
5. Use a cotton swab for the edges
Dip a cotton swab in a bit of alcohol and clean around the webcam edges. It helps reach areas the cloth can’t. This removes any hidden dust or grime stuck in the corners.
6. Dry the area
Use the dry part of your microfiber cloth to wipe off any remaining moisture. Make sure the lens and the surrounding area are completely dry. This prevents streaks and keeps your webcam clear.
7. Wait before using
Allow your laptop to sit for a few minutes before turning it back on. This keeps everything dry and safe. Once completed, your webcam will be clean and ready for clear video calls.
Precautions
- Don’t use harsh chemicals: Avoid using strong cleaners like bleach, window spray, or ammonia. These can damage the webcam lens or leave scratches.
- Never spray liquid directly on the webcam: Always apply the cleaning solution to a cloth or cotton swab first. Spraying directly can cause liquid to seep into the camera or screen.
- Use soft, clean materials only: Do not use paper towels or tissues since they can scratch the surface. Always use a microfiber cloth or something designed for screens.
- Be gentle when wiping: Don’t press too hard on the webcam lens. Light pressure is enough to remove dirt without causing damage.
- Keep moisture away from other laptop parts: Make sure the cleaning liquid doesn’t drip onto the keyboard or screen edges. It may damage your laptop’s internal components.
Cleaning Frequency
How often should you clean your laptop webcam? It depends on your environment and usage.
- Clean every 2 to 3 weeks: For regular laptop users, cleaning your webcam every 2 to 3 weeks helps keep the lens clear and the video sharp.
- Clean more often in dusty areas: If you live or work in a dusty environment, you should clean your camera at least once a week. Dust builds quickly and degrades the video quality.
- Wipe before important calls: Before any video meeting, class, or recording, give your webcam a quick clean. A clear lens helps you look more professional and confident on screen.
Conclusion
So, in this article, we’ve covered how to clean a laptop webcam in depth. In my opinion, keeping your camera clean not only improves clarity but also makes you appear more professional during video conversations. Try these steps today to observe the difference, and if you enjoyed the article, please remember it or share it with someone who might find it useful.
Frequently Asked Questions (FAQs)
Yes, but use only a small amount. Always dampen a microfiber cloth—never apply water directly to the webcam.
To improve the quality of your laptop camera, start by gently cleaning the lens with a microfiber cloth to remove any dust or smudges. Then, increase the lighting around you and adjust camera settings such as brightness and contrast to get a sharper, clearer video.
Clean it every 2–3 weeks for regular use. If your environment is dusty or if you use the webcam daily, clean it more often.
Use a microfiber cloth or lens-cleaning cloth. Avoid tissues or paper towels they can scratch the lens.
To clean an unclear camera lens, use a microfiber cloth to gently remove any moisture or fingerprints. If the fog remains, use a lens cleaner or a cloth with a tiny bit of isopropyl alcohol to thoroughly clean the lens.


- Be Respectful
- Stay Relevant
- Stay Positive
- True Feedback
- Encourage Discussion
- Avoid Spamming
- No Fake News
- Don't Copy-Paste
- No Personal Attacks
- Be Respectful
- Stay Relevant
- Stay Positive
- True Feedback
- Encourage Discussion
- Avoid Spamming
- No Fake News
- Don't Copy-Paste
- No Personal Attacks
